프로그래머스
코드 중심의 개발자 채용. 스택 기반의 포지션 매칭. 프로그래머스의 개발자 맞춤형 프로필을 등록하고, 나와 기술 궁합이 잘 맞는 기업들을 매칭 받으세요.
programmers.co.kr
문제지
당신은 고양이들을 모시고 있는 어느 집사에게 자신의 고양이 사진을 관리해달라는 의뢰를 받았습니다.
의뢰인은 당신이 믿을만한 사람인지 테스트하기 위해, 약간의 사진을 당신에게 보냈으며 이 사진들을 웹에서 볼 수 있도록 해달라고 합니다.
이 사진을 어떻게 처리할까 고민 중이던 때, 당신의 절친한 친구 Back-end 개발자가 당신을 돕기 위해 의뢰인이 보낸 사진들을 API 형태로 만들어주었습니다.
이 API를 이용해, 의뢰인을 만족시킬 수 있는 고양이 사진첩 애플리케이션을 만들어봅시다!
애플리케이션 예시 이미지
아래와 같이 디렉토리 구조를 따라 탐색할 수 있는 사진첩 애플리케이션을 만듭니다.
root 경로 탐색 중인 경우
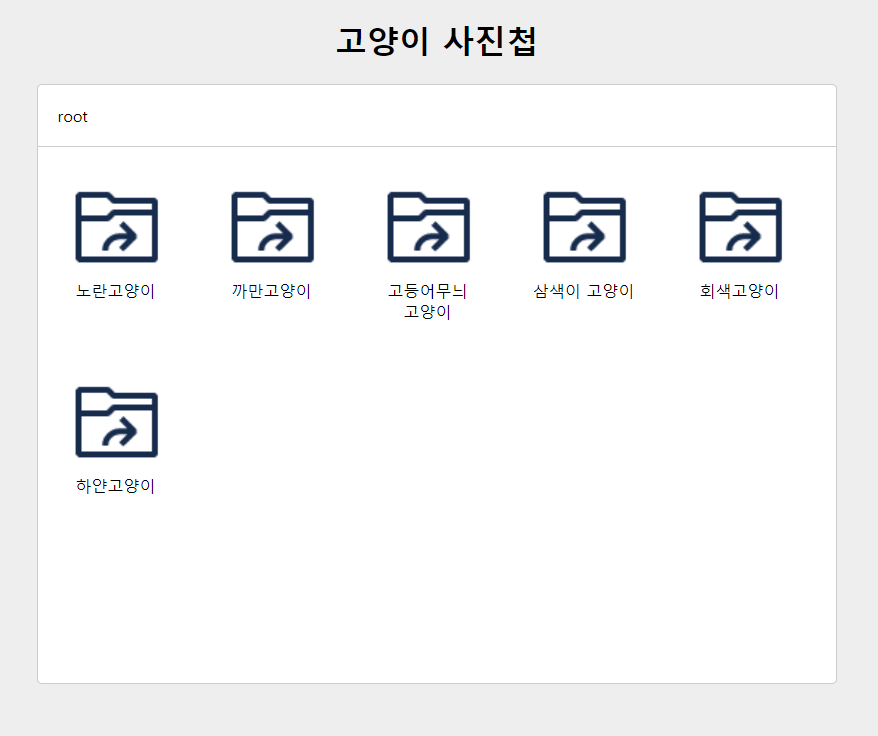
- 디렉토리를 클릭한 경우 해당 디렉토리 하위에 속한 디렉토리 / 파일들을 불러와 렌더링합니다.
- 디렉토리 이동에 따라 위에 Breadcrumb 영역도 탐색한 디렉토리 순서에 맞게 업데이트가 되어야 합니다.
root - 노란고양이(디렉토리) 를 탐색 중인 경우

- 맨 왼쪽 화살표를 누른 경우, 이전 디렉토리로 돌아갑니다.
- 파일을 누른 경우 해당 파일의 filePath 값을 이용해 이미지를 보여줍니다.
물 마시는 사진(파일)을 클릭한 경우
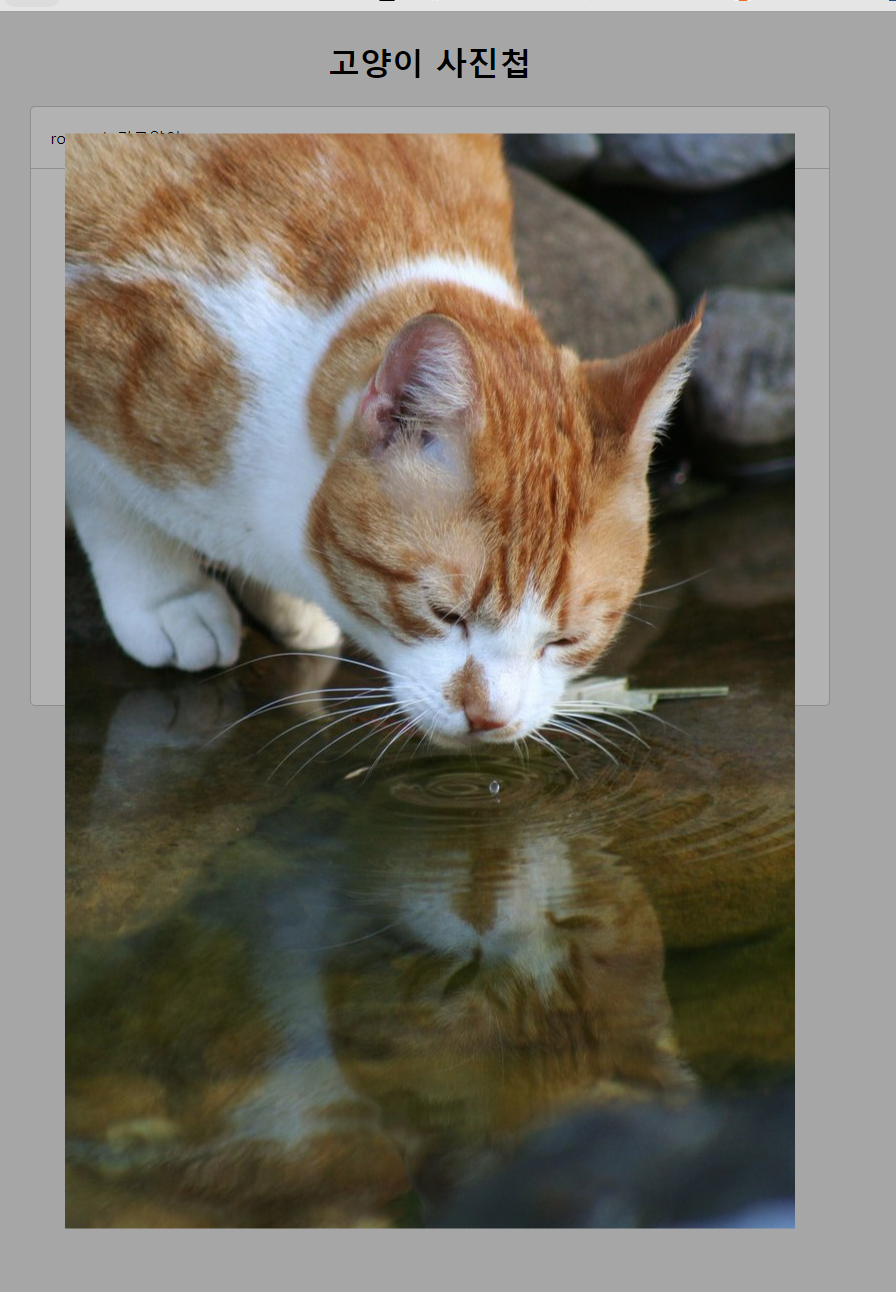
- esc를 누르거나 사진 영역 밖을 클릭한 경우 이미지를 닫아야합니다.
구현 시 유의사항
- 주어진 샘플 코드 내에서 구현을 해야합니다. 별도의 라이브러리 등을 설치하거나 불러와서 사용하는 행위는 금지합니다.
- 각 화면의 UI요소는 가급적 컴포넌트 형태로 추상화 하여 동작하도록 합니다.
- 각 컴포넌트가 서로 의존성을 지니지 않고, App 혹은 그에 준하는 컴포넌트가 조율하는 형태로 동작하게 만드는 것을 지향합니다.
- API 호출 중 에러가 발생했을 때의 처리를 한 경우 가산점이 있습니다.
- 의존성이 느슨한 구조로 작성한 경우 가산점이 있습니다.
- 오류가 발생한 경우를 체크하는 경우 가산점이 있습니다.
- 오류가 발생했음을 사용자에게 인지 시킨 경우 가산점이 있습니다.
- ES6 모듈 형태로 작성한 경우 가산점이 있습니다.
- API를 호출하는 함수는 가급적 fetch 함수를 사용합니다.
- async, await 문을 사용한 경우 가산점이 있습니다.
- fetch 외의 방법을 사용할 경우, 동기 호출 방식으로 사용해서는 안 됩니다.
- API를 처리하는 코드를 별도의 코드로 분리해주세요.
- 기본적으로 아래 마크업 가이드에서 제공하는 구조와 class명을 사용하여 작업합니다. 이를 처리하기 위한 style은 src/styles/style.css 에서 참고 할 수 있습니다.
- 그 외 알아보기 쉬운 네이밍, 일관된 코드 포맷팅 규칙 등을 유지하도록 하며, 코드 중복은 지양합니다.
- 전역 오염을 최소화 합니다.
- 이벤트 바인딩은 가급적 최적화 해서 사용합니다.
필수 구현사항
- app이라는 class를 가진 main에 애플리케이션을 렌더링합니다.
- index.html에 기본으로 있는 마크업 구조를 참고하여, 애플리케이션을 크게 세 가지 영역으로 나누어서 렌더링합니다.
- Breadcrumb - 현재 탐색 중인 경로를 나타냅니다. root를 맨 왼쪽에 넣어야하며, 탐색하는 폴더 순서대로 나타냅니다.
- 사진첩을 처음 들어간 상태라면 root 경로를 탐색 중이므로 root 만 나와야 합니다.
- root를 기준으로 노란고양이 를 클릭했다면 root - 노란고양이 처럼 root를 시작지점으로 하여 거쳐간 디렉토리 이름을 순서대로 나열해야 합니다.
- 마크업은 아래를 참고합니다.
- Nodes - 현재 탐색 중인 경로에 속한 파일 / 디렉토리를 렌더링합니다. 렌더링 된 Node 클릭 시 node의 type에 따라 다음과 같은 일이 일어나야 합니다.
- DIRECTORY: 해당 디렉토리에 속한 파일 / 디렉토리를 불러와 아래의 형태로 렌더링합니다. 마크업은 아래 형태와 같습니다.
- FILE: Node의 filePath값을 이용해 이미지를 불러와 화면에 렌더링합니다. 마크업은 아래 형태와 같습니다.
- root 경로가 아닌 경우, Nodes 목록 맨 왼쪽에 이전 디렉토리로 이동할 수 있는 기능을 구현해야 합니다. 마크업은 아래를 참고합니다.
- ImageView - 파일을 클릭한 경우 Modal을 하나 띄우고 해당 Modal에서 파일의 이미지를 렌더링합니다. 마크업은 아래를 참고합니다.
- Breadcrumb - 현재 탐색 중인 경로를 나타냅니다. root를 맨 왼쪽에 넣어야하며, 탐색하는 폴더 순서대로 나타냅니다.
옵션 구현사항
아래의 구현사항은 필수는 아니지만, 구현 시 가산점이 있습니다.
- Breadcrumb에 렌더링 된 경로 목록의 특정 아이템을 클릭하면, 해당 경로로 이동하도록 처리합니다. ex) Breadcrumb에 root - 노란고양이 - 2021/04 가 렌더링 된 상태인 경우
- 2021/04 를 클릭한 경우 현재 경로와 같으므로 아무 일도 일어나지 않음
- 노란고양이 를 클릭하면 노란고양이 경로 기준으로 파일 / 디렉토리 목록 렌더링
- root 를 클릭하면 root 경로 기준으로 파일 / 디렉토리 목록 렌더링.
- 파일을 클릭하여 이미지를 보는 경우, 닫을 수 있는 처리를 해야합니다.
- ESC키를 눌렀을 때와 이미지 밖을 클릭했을 때, 둘 중 한 가지 혹은 두 가지 모두 처리합니다.
- 데이터가 로딩 중인 경우는 로딩 중임을 알리는 UI적 처리를 해야하며, 로딩 중에는 디렉토리 이동이나 파일 클릭 등 액션이 일어나는 것을 막아야 합니다.
- 한번 로딩된 데이터는 메모리에 캐시하고 이미 탐색한 경로를 다시 탐색할 경우 http 요청을 하지 말고 캐시된 데이터를 불러와 렌더링하도록 합니다.
API 개요
두 개의 API를 사용합니다.
root 내용 가져오기
사진첩의 root 경로에 있는 파일들과 디렉토리들을 불러옵니다.
응답의 예시는 아래와 같습니다.
[
    {
    	"id": "1",
        "name": "노란고양이",
        "type": "DIRECTORY",
        "filePath": null,
        "parent": null
   },
   {
     	"id": "3",
        "name": "까만고양이",
        "type": "DIRECTORY",
        "filePath": null,
        "parent": null
    },
      .....
]
특정 디렉토리에 속하는 파일 / 디렉토리 불러오기
- https://zl3m4qq0l9.execute-api.ap-northeast-2.amazonaws.com/dev/:nodeId
- method: GET
nodeId 하위에 있는 파일 / 디렉토리 목록을 불러옵니다.
응답의 예시는 아래와 같습니다.
// https://zl3m4qq0l9.execute-api.ap-northeast-2.amazonaws.com/dev/1 호출 시
[
	{
    	"id": "5",
        "name": "2021/04",
        "type": "DIRECTORY",
        "filePath": null,
        "parent": { "id": "1" }
    },
    {
    	"id": "19",
        "name": "물 마시는 사진",
        "type": "FILE",
        "filePath": "/images/a2i.jpg",
        "parent": { "id": "1" }
    }
]
두 API에서 사용하는 데이터의 형태는 모두 아래의 형태를 띕니다.
{
    "id": string // 문자열로 된 Node의 고유값입니다.
    "name": string // 디렉토리 혹은 파일의 이름입니다. 화면에 표시할 때 사용합니다.
    "type": string // 파일인지 디렉토리인지 여부입니다. 파일인 경우 FILE, 디렉토리인 경우 DIRECTORY 입니다.
    "filePath": string // 파일인 경우에 존재하는 값입니다. 해당 파일 이미지를 불러오기 위한 경로가 들어있습니다.
    "parent": object | null {
    	"id": string // 해당 Node가 어디에 속하는지 나타내는 값입니다. parent가 null이면 root에 존재하는 파일 / 디렉토리입니다.
    }
}
이미지 불러오기
- Node의 filePath 값을 아래의 값과 조합하여, 이미지를 불러올 수 있는 주소를 만들 수 있습니다.
- filePath 맨 앞에 /가 포함될 수도 있으므로, 아래의 값과 잘 조합하여 이미지를 불러오도록 합니다.
https://fe-dev-matching-2021-03-serverlessdeploymentbuck-t3kpj3way537.s3.ap-northeast-2.amazonaws.com/public/${node.filePath}
풀이..?
폴더 구조
PROJECT
    > .gradle
    > assets
    > node_modules
    > src
    	> api
            > api.js
        > components
            > Breadcrumb.js
            > ImageView.js
            > Loading.js
            > Nodes.js
        > styles
            > style.css
        > App.js
        > main.js
    > .gitignore
    > index.html
    > package-lock.json
    > package.json
    > Procfile
    > README.md
main.js
main.js에 App컴포넌트를 생성하였다.
// main.js
new App(document.querySelector("#App"));
원래 위와 같은 형태로 정의를 했지만, es6의 import, export 기능을 이용하면 index.html에서 모듈 의존 순서에 맞게 script src로 스크립트를 불러올 필요 없이, main.js만 불러오게 하고 나머지는 각 컴포넌트에서 필요한 스크립트만 import 가능
먼저, main.js 정의
// main.js
import App from './App.js'

new App(document.querySelector('.app))
그리고 index.html에 스크립트 로딩 부분 수정
<html>
  <head>
    <title>고양이 사진첩!</title>
    <link rel="stylesheet" href="./src/styles/style.css">

    <!-- type="module"을 추가함 -->
    <script src="./src/main.js" type="module"></script>

  </head>
  <body>
    <h1>고양이 사진첩</h1>
    <main class="App">
      ...
    </main>
    ...
  </body>
</html>
Breadcrumb.js
// Breadcrumb.js
function Breadcrumb({ $app, initialState }) {
    this.state = initialState
    this.$target = document.createElement("nav")
    this.$target.className = "Breadcrumb"
    $app.appendChild(this.$target)

    this.setState = nextState => {
        this.state = nextState
        this.render()
    }

    this.render = () => {
        this.$target.innerHTML = `
            <div class="nav-item">root</div>
            ${this.state.map((node, index) => `
                <div class="nav-item" data-index="${index}">${node.name}</div>
            `).join("")}
        `
    }
}
위와 같은 코드는 단순히 state를 기준으로 랜더링 하는 코드로 Nodes에서 일어나는 어떤 인터렉션에 의해 Breadcrumb에도 영향을 주어야하기 때문에, 의존성을 줄이고 독립성을 높이기 위해 상위의 컴포넌트를 만들어 콜백 함수를 통해 느슨하게 결합하는 방식을 사용
일단, Nodes 함수를 만드는 과정부터 진행하자면,
Nodes.js
// Nodes.js
function Nodes({ $app, initialState, onClick }) {
    this.state = initialState
    this.$target = document.createElement("ul")
    $app.appendChild(this.$target)

    this.setState = (nextState) => {
        this.state = nextState
        this.render()
    }


    this.onClick = onClick

    this.render = () => {
        if (this.state.nodes) {
            const nodesTemplate = this.state.nodes.map(node => {
                const iconPath = node.type === "FILE" ? "./assets/file.png" : "./assets/directory.png"
                return `
                    <div class="Node" data-node-id="${node.id}">
                        <img src="${iconPath}" />
                        <div>${node.name}</div>
                    </div>
                `
            }).join("")
        }

        // 랜더링된 이후 클릭 가능한 모든 요소에 click이벤트 걸기
        this.$target.querySelectorAll(".Node").forEach($node => {
            $node.addEventListener("click", (e) => {
                // dataset 통해 data-로 시작하는 attribute를 꺼내올 수 있음
                const { nodeId } = e.target.dataset
                const selectedNode = this.state.nodes.find(node => node.id === nodeId)

                if (selectedNode) {
                    this.onClick(selectedNode)
                }
            })
        })
    }

    this.render()
}
이제, Nodes와 Breadcrumb를 조율하기 위한 App.js 컴포넌트를 작성
App.js
// App.js
function App($app) {
    this.state = {
        isRoot: false,
        nodes: [],
        depth: []
    }

    // Breadcrumb 조율
    const breadcrumb = new Breadcrumb({
        $app,
        initialState: this.state.depth
    })

    // Nodes 조율
    const nodes = new Nodes({
        $app,
        initialState: {
            isRoot: this.state.isRoot,
            nodes: this.state.nodes
        },
        onClick: (node) => {
            if (node.type === "DIRECTORY") {
                // DIRECTORY인 경우
            } else if (node.type === "FILE") {
                // FILE인 경우
            }
        }
    })
}
위와 같이 구성을 하면, 두 컴포넌트(Breadcrumb, Nodes)는 독립적으로 구성되고, 쉽게 재활용할 수 있는 구조가 됨
api/api.js
이제, 위의 App.js의 기본적인 구조를 토대로 api를 요청하여 초기 데이터를 불러와서 넣기 위한 과정을 진행하였다.
지난 과제에서 진행한 코드를 거의 복붙 했다. 가급적 fetch 함수를 사용하라고 정의해두었고, fetch함수를 사용할 경우 Promise객체는 HTTP Error 상태를 보여주지 않기 때문에, 각 status code를 나누어 오류를 구분하였다.
사실 이게 맞는 건지는 아직 잘 모르겠다..프론트엔드 너무 어려웡
이전의 과제를 진행하면서 실제 fetch 함수를 호출하는 부분을 분리하여 유틸리티 함수로 분리하였다. 그리고 API_ENDPOINT를 나중에 변경되었을 경우를 생각하여 상수처리를 하고, request 함수를 만들어 async ~ await 문법을 사용하여 구현하였다.
// api.js
const API_ENDPOINT = "https://zl3m4qq0l9.execute-api.ap-northeast-2.amazonaws.com/dev"

export const request = async (nodeId) => {
    try {
        const result = await fetch(`${API_ENDPOINT}/${nodeId ? nodeId : ''}`);
        if (result.status < 300) return result.json();
        else if (result.status < 400) throw new Error(`Code ${result.status} : Redirection Error`)
        else if (result.status < 500) throw new Error(`Code ${result.status} : Client Error`)
        else if (result.status < 600) throw new Error(`Code ${result.status} : Server Error`)
    } catch (err) {
        throw new Error(`${err.message}`)
    }
};

const api = {
    // Root 내용 가져오는 api
    fetchRoot () {
        return request();
    },
    // 특정 Directory 내용 가져오는 api
    fetchDirectory (nodeId) {
        return request(nodeId);
    }
};
이후, App.js를 다시 고치게 되면,
App.js
// App.js
function App($app) {
    this.state = {
        isRoot: false,
        nodes: [],
        depth: []
    }

    // Breadcrumb 조율
    const breadcrumb = new Breadcrumb({
        ...
    })

    // Nodes 조율
    const nodes = new Nodes({
        ...
    })

    this.setState = (nextState) => {
        this.state = nextState
        breadcrumb.setState(this.state.depth)
        nodes.setState({
            isRoot: this.state.isRoot,
            nodes: this.state.nodes
        })
    }

    const init = async = () => {
        try {
            const rootNodes = await request()
            this.setState({
                ...this.state,
                isRoot:true,
                nodes: rootNodes
            })
        } catch (err) {
            throw new Error(err)
        }
    }
}
그리고, Directory 클릭 시 데이터를 불러와 랜더링 하도록 처리하는 onClick 과정을 보충한다.
// App.js
function App($app) {
    this.state = {
        isRoot: false,
        nodes: [],
        depth: []
    }

    // Breadcrumb 조율
    const breadcrumb = new Breadcrumb({
        ...
    })

    // Nodes 조율
    const nodes = new Nodes({
        $app,
        initialState: [],
        onClick: async (node) => {
            try {
                if (node.type === "DIRECTORY") {
                    // DIRECTORY인 경우
                    const nextNodes = await request(node.id)
                    this.setState({
                        ...this.state,
                        depth: [ ...this.state.depth, node ],
                        nodes: nextNodes
                    })
                } else if (node.type === "FILE") {
                    // FILE인 경우
                }
            } catch (err) {
                throw new Error(err)
            }
        }
    })

    ...
}
그리고, ImageView를 처리하는 과정
ImageView.js
아래의 마크업 구조를 이용해 ImageView 처리
<div class="ImageViewer">
    <div class="content">
        <img src="https://fe-dev-matching-2021-03-serverlessdeploymentbuck-t3kpj3way537.s3.ap-northeast-2.amazonaws.com/public/images/a2i.jpg">
    </div>
</div>
// ImageView.js
const IMAGE_PATH_PREFIX ="https://fe-dev-matching-2021-03-serverlessdeploymentbuck-t3kpj3way537.s3.ap-northeast-2.amazonaws.com/public"
function ImageVies({ $app, initialState }) {
this.state = initialState
this.$target = document.createElement("div")
this.$target.className = "Modal ImageView"
$app.appendChild(this.$target)
this.setState = (nextState) => {
this.state = nextState
this.render()
}
this.render = () => {
this.$target.innerHTML = `
<div clas="content">
${this.state ? `<img src="${IMAGE_PATH_PREFIX}${this.state}" />` : ``}
</div>
`
}
this.render()
}
그 후 다시 App.js의 FILE부분을 고치면,
// App.js
function App($app) {
    this.state = {
        ...
        selectedFilePath: null,
    }

    // Breadcrumb 조율
    const breadcrumb = new Breadcrumb({
        ...
    })

    // ImageView 조율
    const imageView = new ImageView({
        $app,
        initialState: this.state.selectedNodeImage
    })


    this.setState = (nextState) => {
        ...
        imageView.setState(this.state.selectedFilePath)
    }

    // Nodes 조율
    const nodes = new Nodes({
        $app,
        initialState: [],
        onClick: async (node) => {
            try {
                if (node.type === "DIRECTORY") {
                    // DIRECTORY인 경우
                    const nextNodes = await request(node.id)
                    this.setState({
                        ...this.state,
                        depth: [ ...this.state.depth, node ],
                        nodes: nextNodes
                    })
                } else if (node.type === "FILE") {
                    // FILE인 경우
                    this.setState({
                        ...this.state,
                        selectedFilePath: node.filePath
                    })
                }
            } catch (err) {
                throw new Error(err)
            }
        }
    })


    ...
}
뒤로 가기 처리
- 하위 Directory로 이동 : depth에 현재 directory node추가
- 이전 Directory로 이동 : depth 마지막 요소를 제거하고, 이전 요소로 이동
Node.js부터 수정
// Nodes.js
function Nodes({ $app, initialState, onClick, onBackClick }) {
    ...

    this.onBackClick = onBackClick

    this.render = () => {
        if (this.state.nodes) {
            const nodesTemplate = this.state.nodes.map(node => {
                const iconPath = node.type === "FILE" ? "./assets/file.png" : "./assets/directory.png"
                return `
                    <div class="Node" data-node-id="${node.id}">
                        <img src="${iconPath}" />
                        <div>${node.name}</div>
                    </div>
                `
            }).join("")

            // Root directory 랜더링이 아닌 경우 뒤로가기를 랜더링
            this.$target.innerHTML = !this.state.isRoot ? `
                <div class="Node">
                    <img src="/assets/prev.png">
                </div>
                ${nodesTemplate}
            ` : nodesTemplate
        }

        // 랜더링된 이후 클릭 가능한 모든 요소에 click이벤트 걸기
        this.$target.querySelectorAll(".Node").forEach($node => {
            $node.addEventListener("click", (e) => {
                // dataset 통해 data-로 시작하는 attribute를 꺼내올 수 있음
                const { nodeId } = e.target.dataset

                // onBackClick
                if (!nodeId) {
                    this.onBackClick()
                }

                const selectedNode = this.state.nodes.find(node => node.id === nodeId)

                if (selectedNode) {
                    this.onClick(selectedNode)
                }
            })
        })
    }

    this.render()
}
그 후, App.js에서 onBackClick을 구현
// App.js
function App($app) {
    ...

    // Nodes 조율
    const nodes = new Nodes({
        $app,
        initialState: [],
        onClick: async (node) => {
            ...
        },
        onBckClick: async () => {
            try {
                // 이전 state 복사해 처리
                const nextState = { ...this.state }
                nextState.depth.pop()

                const prevNodeId = nextState.depth.length === 0 ? null : nextState.depth[nextState.depth.length = 1].id

                // Root로 온 경우 이므로, Root 처리
                if (prevNodeId === null) {
                    const rootNodes = await request()
                    this.setState({
                        ...nextState,
                        isRoot: true,
                        nodes: rootNodes
                    })
                } else {
                    const prevNodes = await request(prevNodeId)
                    this.setState({
                        ...nextNodes,
                        isRoot: false,
                        nodes: prevNodes
                    })
                }
            } catch (err) {
                throw new Error(err)
            }
        }
    })


    ...
}
import / export
// 다른 코드에도 import, export 적용
export default function App($app) { ... }

export default function Nodes(...) { ... }

export default function Breadcrumb(...) { ... }

export default function ImageView(...) { ... }

// 각 파일의 의존성에 맞게 import문으로 App.js에 import
import ImageView from "./ImageView.js"
import Breadcrumb from "./Breadcrumb.js"
import Nodes from "./Nodes.js"
import { request } from "../api/api.js"
Loading.js
아래의 마크업을 이용해 로딩 처리
<div class="Loading">
    <div class="content">
        <img src="./assets/nyan-cat.gif" />
    </div>
</div>
// Loading.js
export default function Loading({ $app, initialState }) {
this.state = initialState
this.$target = document.createElement("div")
this.$target.className = "Loading Modal"
$app.appendChild(this.$target)
this.setState = (nextState) => {
this.state = nextState
this.render()
}
this.render = () => {
this.$target.innerHTML = `
<div class="content">
<img src="./assets/nyan-cat.gif" />
</div>
`
this.$target.style.display = this.state ? 'block' : 'none'
}
this.render()
}그리고, App.js에서 컴포넌트 생성
// App.js
function App($app) {
    this.state = {
        ...
        isLoading:false
    }

    const loading = new Loading(this.state.isLoading)

    this.setState = (nextState) => {
        ...
        loading.setState(this.state.isLoading)
    }

    ...

    const init = async = () => {
        try {
            this.setState({
                ...this.state,
                isLoading: true
            })
            const rootNodes = await request()
            this.setState({
                ...this.state,
                isRoot: true,
                nodes: rootNodes
            })
        } catch (err) {
            throw new Error(err)
        } finally {
            this.setState({
                ...this.state,
                isLoading:false
            })
        }
    }
}
캐싱 구현
현재, App컴포넌트가 중앙 제어하는 형식으로 App컴포넌트에 캐시를 위한 Object 만들어 쓰는 것으로 처리 가능
// App.js
const cache = {}

export default function App($app) {
    const nodes = new Nodes({
        $app,
        initialState: [],
        onClick: async (node) => {
            try {
                if (node.type === "DIRECTORY") {
                    if (cache[node.id]) {
                        this.setState({
                            ...this.state,
                            depth: [...this.state.depth, node],
                            nodes nextNodes
                        })
                    } else {
                        const nextNodes = await request(node.id)
                        this.setState({
                            ...this.state,
                            depth: [...this.state.depth, node],
                            nodes nextNodes
                        })
                        // cache update
                        cache[node.id] = nextNodes
                    }
                } else if (node.type === "FILE") {
                    ...
                }
            } catch (err) {
                throw new Error(err)
            }
        },
        onBackClick : async() => {
            try {
                ...

                if (prevNodeId === null) {
                    const rootNodes = await request()
                    this.setState({
                        ...nextState,
                        isRoot: true,
                        nodes: cache.rootNodes
                    })
                } else {
                    this.setState({
                        ...nextNodes,
                        isRoot: false,
                        nodes: cache[prevNodes]
                    })
                }
            } catch (err) {
                throw new Error(err)
            }
        }
    })

    const init = async () => {
        this.setState({
            ...this.state,
            isLoading: true
        })
        try {
            const rootNodes = await request()
            this.setState({
                ...this.state,
                isRoot: true,
                isLoading: false,
                nodes: rootNodes
            })
            // 캐시에 추가
            cache.root = rootNodes
        } catch (err) {
            this.onError(err)
        }

    }

}
이벤트 최적화
node마다 걸던 클릭 이벤트를 단 하나의 이벤트로 걸어 처리 가능. render 한 후 다시 이벤트를 걸지 않아도 되는 장점
// Node.js
export const Nodes({ $app, onClick, onBackClick }) {
    ...

    this.render = () => {

    ...

    // 기존 이벤트 바인딩 코드 제거 후
    }

    this.$target.addEventListener("click", (e) => {

        // closest를 이용하면 현재 클릭한 요소와 제일 인접한 요소를 가져올 수 있음
        const $node = e.target.closest(".Node")
        if ($node) {
            this.onBackClick()
            return
        }

        const selectedNode = this.state.nodes.find(node => node.id === nodeId)
        if (selectedNode) {
            this.onClick(selectedNode)
            return
        }
    })

}
Breadcrumb을 클릭해 이전 path로 돌아가기
// Breadcrumb.js
export default function Breadcrumb({ $app, initialState = [], onClick }) {
    ...

    this.onClick = onClick

    this.$target.addEventListener("click", (e) => {
        const $navItem = e.target.closest(".nav-item")
        if ($navItem) {
            const { index } = $navItem.dataset,
            this.onClick(index ? parseInt(index, 10) : null)
        }
    })

    this.render()
}
// App.js
const breadcrumb = new Breadcrumb({
...
onClick: (index) => {
if (index === null) {
this.setState({
...this.state,
depth: [],
nodes: cache.root
})
return
}
// breadcrumb에서 현재 위치를 누른 경우는 무시함
if (index === this.state.depth.length - 1) {
return
}
const nextState = { ...this.state }
const nextDepth = this.state.depth.slice(0, index + 1)
this.setState({
...nextState,
depth: nextDepth,
nodes: cache[nextDepth[nextDepth.length - 1].id]
})
}
})
선언적 프로그래밍과 컴포넌트 추상화
명령형 프로그래밍
nodes를 파라미터로 받아 DOM에 직접 접근하여 UPDATE 하는 함수로 DOM을 직접 접근하는 것에 제한과 규칙이 없고, 재사용이 쉽지 않음
DOM에 접근하고 업데이트하는 시점에 대한 명확한 기준점이 없어서 수정이 힘듦
function renderNodes(nodes) {
    const $container = document.querySelector(".container")
    nodes.forEach(node => {
        const $node = document.createElement("div")
        ...
        $container.appendChild($node)
    })
}
선언적 프로그래밍(컴포넌트 형태로 추상화)
// 1. FUNCTION 문법
function Nodes({ $app, initialState }) {
    this.state = initialState

    // Nodes 컴포넌트를 랜더링 할 DOM을 this.$target이라는 이름으로 생성
    this.$target = document.createElement("ul")
    $app.appendChild(this.$target)

    // state 받아서 현재 컴포넌트의 state 변경하고 다시 랜더링
    this.setState = (nextState) => {
        this.state = nextState

        // render함수 내에서 this.state 기준으로 랜더링하기 때문에 상태가 변경되면 자동 화면 변경됨
        this.render()
    }

    // 파라미터가 없는 Nodes의 render 함수로, 현재 상태(this.state)기준으로 랜더링
    this.render = () => {
        this.$target.innerHTML = this.state.nodes.map(node => `
            <li>${node.name}</li>
        `)
    }

    // 인스턴스 이후 바로 render 함수 실행해, new로 생성하자마자 랜더링 되도록 할 수 있음
    this.render()
}
// 2. Class 문법
class Nodes {
// new 키워드로 해당 컴포넌트가 생성되는 시점에 실행됨
// 해당 컴포넌트가 표현될 element 생성하고, 파라미터로 받은 $app(DOM변수)에 랜더링하게 함
constructor ({ $app, initialState }) {
this.state = initialState
this.$target = document.createElement("ul")
$app.appendChild(this.$target)
this.render()
}
setState(nextState) {
this.state = nextState
this.render()
}
render() {
this.$target.innerHTML = this.state.nodes.map(node => `
<li>${node.name}</li>
`)
}
}
References
'Algorithm > 과제' 카테고리의 다른 글
| [과제] FE - 고양이 사진 검색 사이트 (0) | 2021.05.13 |
|---|

댓글